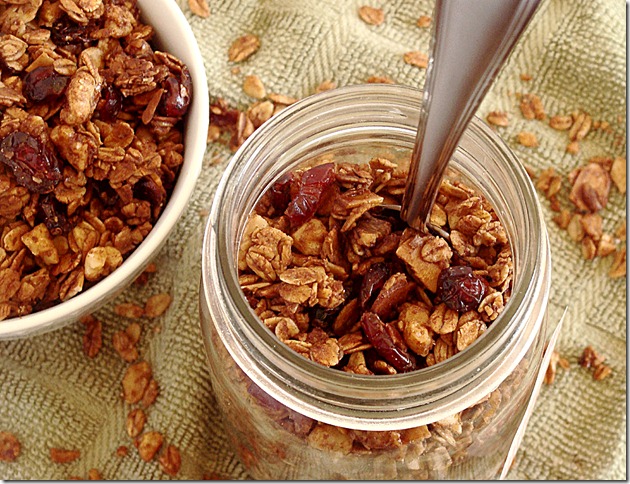
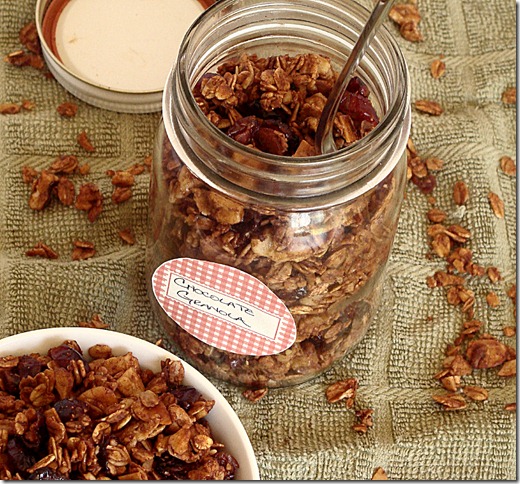
Chocolate Granola

Granola

I have an obsession with breakfast food. Cereals and crunchy granola, in particular. I eat a bowl of either one every morning, and another bowl of either one (sometimes I mix ‘em up in the same bowl) for a late night snack.

I also love eggs, bacon, crepes, pancakes, French toast… oh sorry, this post is not about any of these.

Back to my granola. I love it.

Granola

I mix it up with a bunch of dried fruits, I sometimes add in chocolate chips, and there are times when I use it to dress up my ice cream. Yep. I’ll take granola any way that I can.

The chocolate granola that I make came about because of my husband. He doesn’t care for breakfast, but he cares a lot for chocolate. This was the best way that I could get him to eat his needed amount of fiber for the day. I’m such a good wifey.

granola

Chocolate Granola

You will need:

  • 3 cups old-fashioned rolled oats
  • 2 tablespoons cocoa powder
  • 1/2 cup sliced almonds
  • 1/2 cup walnuts, chopped
  • 1/2 tablespoon wheat germ
  • 1/4 teaspoon ground cinnamon
  • 1/4 teaspoon salt
  • 1 cup dried fruits (optional)
  • 1/4 cup water
  • 1/4 cup canola oil
  • 1/2 cup honey
  • 2 tablespoons light brown sugar
  • 1/2 teaspoon pure vanilla extract

Directions:

  • Preheat oven at 325.
  • Prepare a baking sheet with parchment paper.
  • In a large bowl combine the rolled oats, cocoa powder, walnuts, almonds, wheat germ, ground cinnamon, salt and dried fruit. 
  • In a small saucepan, pour in the water, oil, honey, brown sugar, and vanilla; bring to a boil, stirring constantly.
  • Pour the honey mixture over the dry ingredients and toss together until all ingredients are coated.
  • Spread onto the baking sheet and bake for about 35 to 40 minutes, stirring occasionally so the mixture browns evenly.
  • For a crunchier granola, bake it for a few minutes longer; the browner the granola, the crunchier it will be.
  • Place on a wire rack to cool.
  • While the granola is still a bit warm, break up some of the larger clumps.
  • Once the granola has cooled, store in an airtight container.
  • Serve with milk, yogurt or even ice cream and some fruit.
  • Keeps in an airtight container for weeks.

granola

One more thing you should know about granola; it keeps you “regular”. I’m not even going to try to find a fancier way to convey that message. It is what it is. Smile

Add just one other thing; Store-bought granola can be high in fat and calories. (And in price!) Create your own so that you can control the amount of fat, calories and sugar.

28 Comments

Filed under Home, Sweets. Now. Please.

Roasted Red Pepper Sandwiches with Herbed Goat Cheese Served on Focaccia Bread

Remember those tasty, squared little focaccia samwiches from my focaccia bread post?


If you are entertaining at home this weekend, these mini samwiches (I love calling it a “samwich”) are something that you will want to serve. They are crunchy, creamy and delicious.

Serve them at your next party, or you can just stick them in your lunch box; they are great any way that you want to enjoy them.


You will need:

  • 1 homemade focaccia bread, cut up into squares
  • Red Peppers, 1 per sandwich (my bread recipe should yield 8 to 10 sandwiches)
  • baby portobello mushrooms, sliced
  • Herbed goat cheese spread

For the goat cheese you will need:

  • 1 tablespoon Extra Virgin Olive Oil
  • 2 teaspoons oregano
  • 2 garlic cloves, minced
  • 2 tablespoons fresh lemon juice
  • salt and pepper to taste
  • 1 package (3 oz.) of goat cheese


Directions:

For the Peppers:

  • To roast the peppers, preheat the broiler and line a sheet pan with parchment paper, or grease it lightly.
  • Cut peppers in half, lengthwise, and remove the seeds and stems.
  • Place peppers cut side down on the sheet pan.
  • Broil for about 15 to 20 minutes.
  • Place the peppers in a bowl and cover with plastic wrap.
  • Peel when cooled.

For the Herbed Goat Cheese Spread:

  • In a small bowl combine all of the ingredients except for the goat cheese, mix well.
  • Coat the goat cheese with the mixture, press the mixture into the cheese with a fork and combine well.
  • Cover it with plastic wrap and refrigerate for at least 1 hour. If you have the time, prepare this a day ahead; the longer it sits, the better it tastes.

Assembling the Sandwiches:

  • Spread the herbed goat cheese on two squared slices of focaccia.
  • Layer the portobello mushrooms on one slice, then follow up with the roasted pepper.
  • Cover with a slice of focaccia, and serve.


32 Comments

Filed under Dinner A la Diethood, Home

Orange Curd Mini Pies

Please join me over at Claire’s wonderful blog, Nutrition for Us, to get a taste of these terrific mini pies!

While you are there, don’t forget to congratulate her; she is getting married this weekend!!

6 Comments

Filed under Home, Sweets. Now. Please.

Strawberry Shortcakes

Want to know how we celebrate the arrival of Spring?

Ta Daaaaa!

This is how we welcomed the beautiful season of rebirth and renewal. The season that’s going to take away the winter blues and lead us on that path toward the long awaited sunshine of gorgeous summer days.

I am so excited to know that spring has finally arrived. Even if the weather outside is barely 40 degrees… I don’t care. It will get better. Soon.

The strawberries I picked up from the Farmers Market had to be used up somehow before they went bad, and the vote was between a strawberry trifle or a strawberry shortcake.

As you can see, the shortcakes won. The trifle can wait.

Besides, the strawberry trifle does not translate well on photos. I tried it once before and it was a disaster.

These shortcakes are pretty to look at and even better to eat. I wanted to keep this recipe simple and traditional thus, for the cakes, I made biscuits with a bit of flour, some neufchatel cheese and orange zest. Beautiful.

The strawberries sat in their juices with some sugar for about an hour, and the whipped cream came out perfect. I chilled it for about 30 minutes before I whipped it with my mixer. That’s the secret – chill it before you whip it.

Strawberry Shortcakes

You will need:

For the Biscuits:

  • 1 cup AP flour
  • 2 teaspoons sugar
  • 2 teaspoons baking powder
  • 1/2 teaspoon orange zest
  • 4 ounces (1/2 of a 8 oz. package) neufchatel cheese, cut in cubes
  • 1/3 cup milk
  • 1 tablespoon milk for brushing the tops

For the Strawberries:

  • 1 1/2 lbs. of fresh strawberries, hulled and sliced
  • 1/3 cup sugar

For the Whipped Cream:

  • 1 cup whipping cream
  • 1/2 teaspoon pure vanilla extract
  • 1 tablespoon sugar

Directions:

For the Biscuits:

  • Preheat oven to 425.
  • Mix flour, sugar, baking powder, and orange zest in a large bowl.
  • Pour in the neufchatel cheese and mash it with a fork until mixture resembles coarse crumbs.

  • Stir in 1/3 cup of milk and form a dough.
  • Flour hands and divide the dough into 8 balls.
  • Place the dough balls 3 inches apart on a greased baking sheet or silpat.

  • With a glass flatten the dough balls to 1/2 inch thickness and brush the tops with milk and sprinkle a bit of sugar on top.
  • Bake 12 to 15 minutes or until golden brown.

  • Take out the biscuits and allow them to cool down to room temperature.
  • In the meantime prepare the strawberries.

For the Strawberries:

  • Once you have cleaned and sliced them, take 1/3 of the strawberries and mash them with a potato masher.

  • Add in the rest of the strawberries and pour in the sugar.
  • Set aside for at least 20 minutes.

For the Whipped Cream:

  • Meanwhile prepare the whipped cream by combining together the whipping cream, vanilla, and sugar.
  • Cover and chill in the refrigerator for 30 minutes.
  • When chilled, beat the mixture until stiff peaks form.

For the Shortcakes:

  • Assemble the shortcakes by cutting the biscuits in half.
  • Place a tablespoon of the strawberry mixture on the bottom half of the biscuit and top with whipped cream.
  • Cover with the top half of the biscuit, and top it with whipped cream and a few more strawberries.
  • Serve immediately or put the cakes in the refrigerator until ready to use.

52 Comments

Filed under Home, Sweets. Now. Please.

Semi-Homemade Cream Cheese Pizza

Judging by some of the comments and emails I received regarding my last post, it seems as if though I was either unclear or I was misunderstood. I think I was misunderstood. Blame it on my accent. (I don’t really have one)

Some of my readers seem to think that I might be a food snob?!? Me?! The girl that makes Pistachio Pudding from a box?

I am far from a food snob – and I do not aspire to become one, either.


The hosts of that party invited us to a “Dinner Party”, and they made it sound as if the party was going to be some sort of a Black-Tie Affair. They even asked me to bring, “that incredible” Chocolate Pie.

I spent four hours on that Chocolate Pie, plus chill time. They spent an hour at Sam’s to buy all the pre-packaged food, and probably another hour to set up.

Again, don’t get me wrong, I do not care that they bought it all from Sam’s, I just wish I wasn’t told that this was going to be a fancy, shmancy “Dinner Party”.

So now I am going to prove to some that I am definitely not a food snob, and that I do make things that come in a box! 🙂


Take this pizza for instance. You will probably never ever see me at a Pizza Hut, but you will definitely see me in the Baking Aisle at the grocery store reaching to grab one of these pouches:

I’ve blogged about this before. It is my favorite mix for a pizza crust and I use it very often.

Sunday was a day to relax, so instead of whipping up something from scratch, I decided that we were going to have a semi-homemade pizza, topped with cream cheese, ham, mozzarella, parmesan, onions, and baby portobella mushrooms.

Semi-Homemade Cream Cheese Pizza

You will need:

  • 1 Betty Crocker Pizza Crust mix
  • 1/4 (2 oz.) of a package of cream cheese, or you can use Neufchatel cheese
  • 1/2 cup baby portobella mushrooms, sliced
  • 1 cup of your favorite ham, diced, or you can use leftover baked/grilled sliced chicken
  • 1 small onion, red or yellow, sliced crosswise
  • 1/2 cup of part-skim mozzarella cheese, shredded
  • Parmesan cheese, grated

Directions:

  • Preheat oven at 450.
  • Make the dough according to the directions on the package.

  • Bake the dough for 7 minutes.
  • Let it cool.
  • Turn the oven down to 400.
  • Once cooled, spread the cream cheese evenly over the crust.

  • Add the rest of the toppings.
  • Bake for 12 minutes, or until the mozzarella cheese is melted.
  • Sprinkle with a handful of parmesan cheese, cut and serve.

47 Comments

Filed under Dinner A la Diethood, Home